Article Bread Bag STEM Activities: Make at Home Parachute
How to make an upcycled bread bag parachute to send small toys soaring!
June 19, 2020

What’s better than using play to explore the wonders of physics, the joy of engineering, and experiment with real-life applications for math? Sending in an airdrop of fun with stuff you already have in your kitchen and toy box! (And finding a creative way to give second life to recyclable materials, too!) Part of our new Bread Bag STEM Activities and Bread Bag Crafts for Kids series, our Make At Home Parachute is pure fun with purpose. A perfect rainy-day diversion, or an excuse to get offline, make something, and grab Dad (or Mom) for outdoor summertime play, kids of all ages will love experimenting to see how far their favourite small toys can fly.
Younger at-home scientists have freedom to improvise using lids, bowls, or plates of different sizes as tracers for their upcycled parachutes. Older kids can test their hypothesis and discover which precise combination of parachute diameter, passenger weight, length of string, and drop height will give their figurine the longest time in the air—or get them closest to the landing zone in different weather conditions. Make one and give all their tiny toys a turn, or collect enough bread bags to make a dozen parachutes and send a flotilla of figurines soaring off the back deck together. Practice indoor-friendly launch techniques from the top of the stairs, or take it to the park and drop your passenger from the platform at the playground.
Whatever you do, there are only two rules for bread bag STEM activities like our Make at Home Parachute: learn through safe, hands-on experimentation, and have fun!
recommended ages:
materials:
instructions:
Step-by-step photos:
How to Make a Bread Bag Parachute
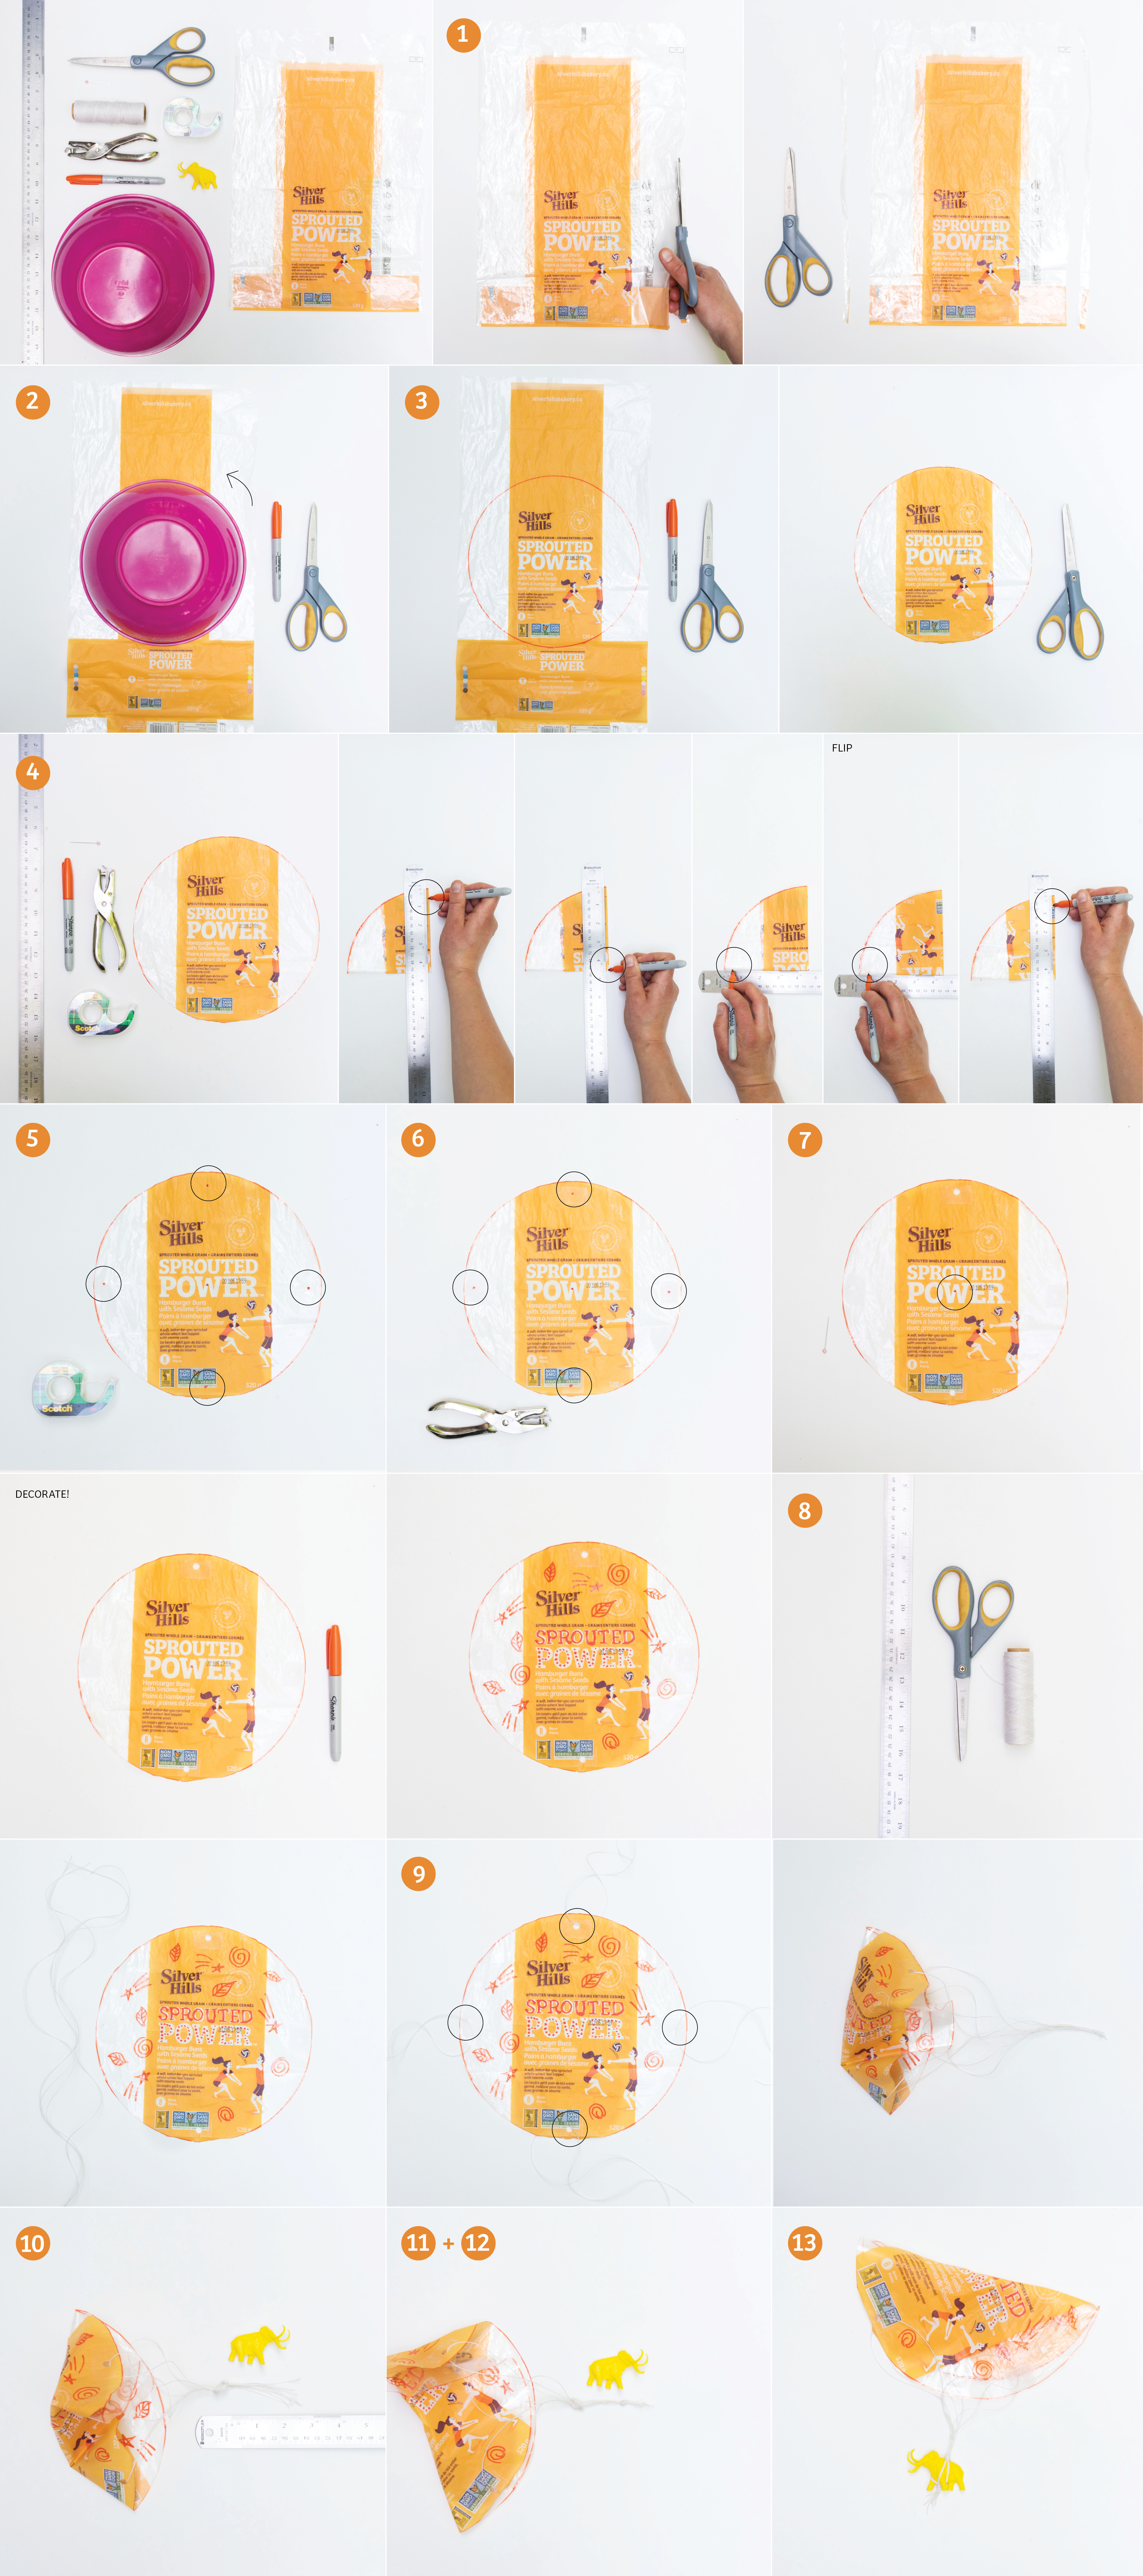
Make your own bread bag parachute with materials you have around the house and send your favourite small toys soaring!
Step 1: Cut open the bread bag so it lies flat in a single layer.
For parachutes smaller than 9-inches, cut both side seams off of the bread bag, as close to the edge as you can (see the how-to video).
For parachutes larger than 9-inches, cut only one of the side seams off of the bread bag. Then cut through the bottom gusset to open and flatten the bag into a single layer. This will give you more material to work with. (It’s okay if the remaining bread bag seam crosses over the corner of a larger parachute (we tested it!)).
Step 2: Using a marker, trace a round pot lid, mixing bowl, or plate on your bread bag.
The more your figurine weighs, the bigger the circle you’ll need for your parachute.
A classic figurine from your favourite colourful interlocking plastic block set is 1 ½-inches tall and weighs 3.5 to 4 grams (depending on the accessories it’s wearing or holding!). We tested ours with both 8-inch and 9 ½-inch parachutes. It flew best with the larger parachute, but your mileage may vary. The purpose of our bread bag STEM activities is to learn through fun—experiment with parachute sizes to find the combination that works best for you!
Step 3: With your scissors, cut out the circle you traced.
(Recycle the rest of the bread bag with other soft plastics).
Step 4: Fold your cut circle into quarters.
Measure ½-inch (1.25cm) in from the corners. Using your marker, make four (4) evenly spaced marks on your circle. Also mark a dot at the centre.
Step 5: Place a small piece of clear tape over each mark on the front of your circle, then flip it over and repeat on the back side.
Taping both the front and back will make punching holes for your parachute strings much easier! (And makes your parachute more durable, too).
Step 6: Using a hole punch, make a hole where each of your four edge-of-circle marks are.
If you don’t have a hole punch, use a heavy-guage needle with a large eye (like the kind used for sewing canvas) to pierce holes and thread your strings through at the same time (after Step 8). If you don’t have either of these, don’t fret—practice your improvising skills! Use a large nail to poke hole, or use scissors to snip a tiny X just large enough for your string to pass through.
Step 7: Using the nail or a push pin, poke a smaller hole through the centre mark.
(This helps your parachute fly straighter by reducing drag).
Step 8: Measure four (4) equal lengths of string.
In the same way heavier passengers need bigger parachutes, the larger the parachute, the longer the string needs to be.
Step 9: Thread one string through each of the four holes on the outside edge of your parachute.
Pull the strings half-way through each hole so the ends are even.
Step 10: Flip your parachute over, so the right side faces down (right side = the printed side of the bread bag).
Gather the ends of all four strings (8 ends total) together, so the ends are even. Tie a knot about 2 ½-inches up from the end. Keep the knot loose at this point, as you may need to adjust where it sits based on the height of your figurine.
Step 11: Tie another knot as close to the bottom of your collection of strings as you can.
This will become a simple harness that will fit figurines and toys of all shapes and sizes!
Step 12: Split the strings between the knots—your harness section—into four strands each.
Step 13: Once your passenger is secure in the harness, your bread bag parachute is ready to fly!
Bread Bag Parachute Tips:
Design Tips:
Engineering and Experimentation Tips:
Flight Tips:
When You’re Done:
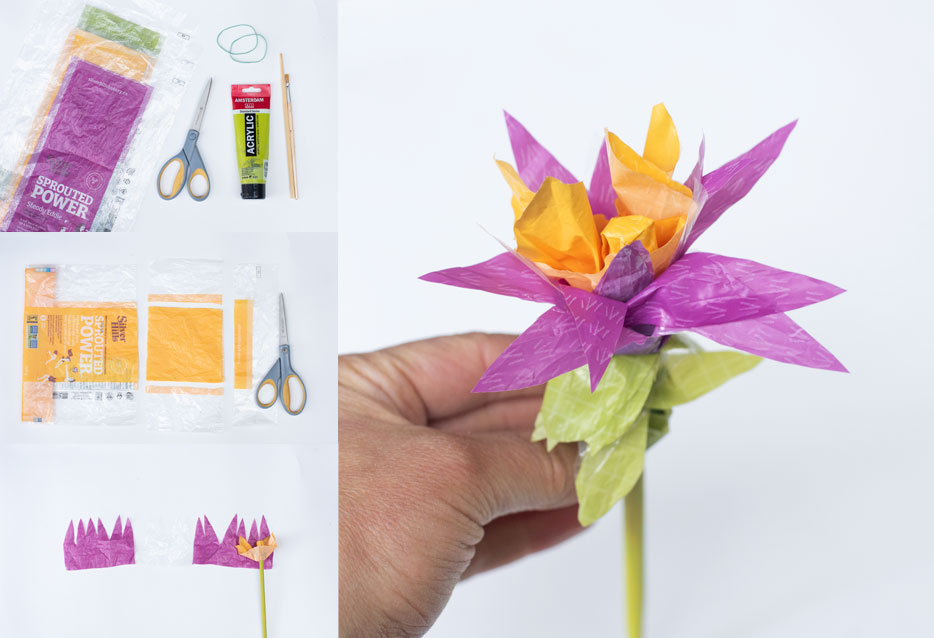
Want more bread bag STEM activities and at home bread bag crafts for kids? Check out our Bread Bag Blooms Craft for Kids! Show us your makes on our Facebook page, or tag us on Instagram.
