Recipe Easy Lunch Ideas Kids Can Make Themselves
Easy lunch recipes, a DIY lunch-packing station, and age-appropriate cooking skills for kids
September 11, 2020
Easy Healthy Packed Lunch Recipes For Kids
Making lunch for the kids doesn’t have to be a chore. Make meals more collaborative with these easy lunch recipes kids can make themselves! Whether your family is packing lunch to-go for school or daycare, or making lunch at home, these healthy, hands-on recipes and tips are a perfect way to invite kids into the kitchen.
From preschoolers to pre-teens, our Packable Tortilla Pizzas are always a hit, and our DIY sprouted crust-free sandwich take on Uncrustables appeals to even the pickiest eaters. But don’t stop there! Set them up for a lifetime of healthy habits by teaching them age-appropriate cooking skills. Starting with everything they need to know to set up their own DIY Kids Lunch Prep Station.
Calling all kids to the kitchen:
Roll up your sleeves and lay out your ingredients. It’s time for lunch!
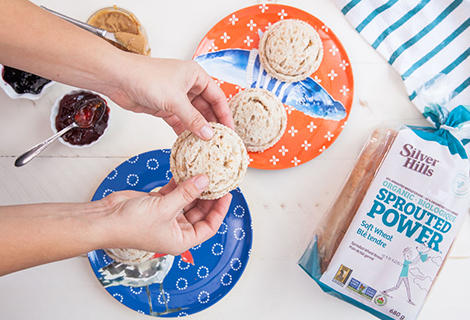
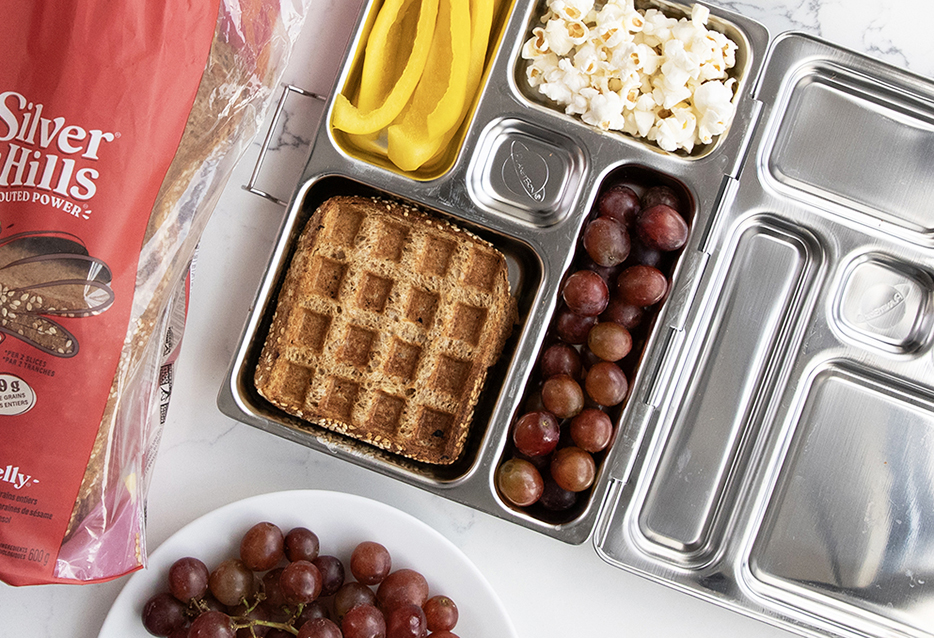
Sprouted Stuffed Crust-free Sandwiches
This DIY take on uncrustables works for any type of sandwich! Encourage the kids to make their favourite sandwich by providing options like nut (or nut-free) butter and jam, hummus and spiralized veggies, or whatever fixings they like between two slices of bread. If you don’t have cookie cutters on hand, two different sized cups work just as well.
Try our very uncomplicated stuffed crust-free sandwiches. These simple handhelds skip the crust and make fun shapes using cookie cutters. After making a sandwich on our organic Soft Wheat bread (or your family’s house favourite), kids can cut off the crusts using a large cookie-cutter and then use a smaller cutter to create a seal that transforms a traditional sandwich into a magic pocket full of yum!
(Scroll down to get the ingredients and instructions for our Sprouted Stuffed Crust-free Sandwiches)
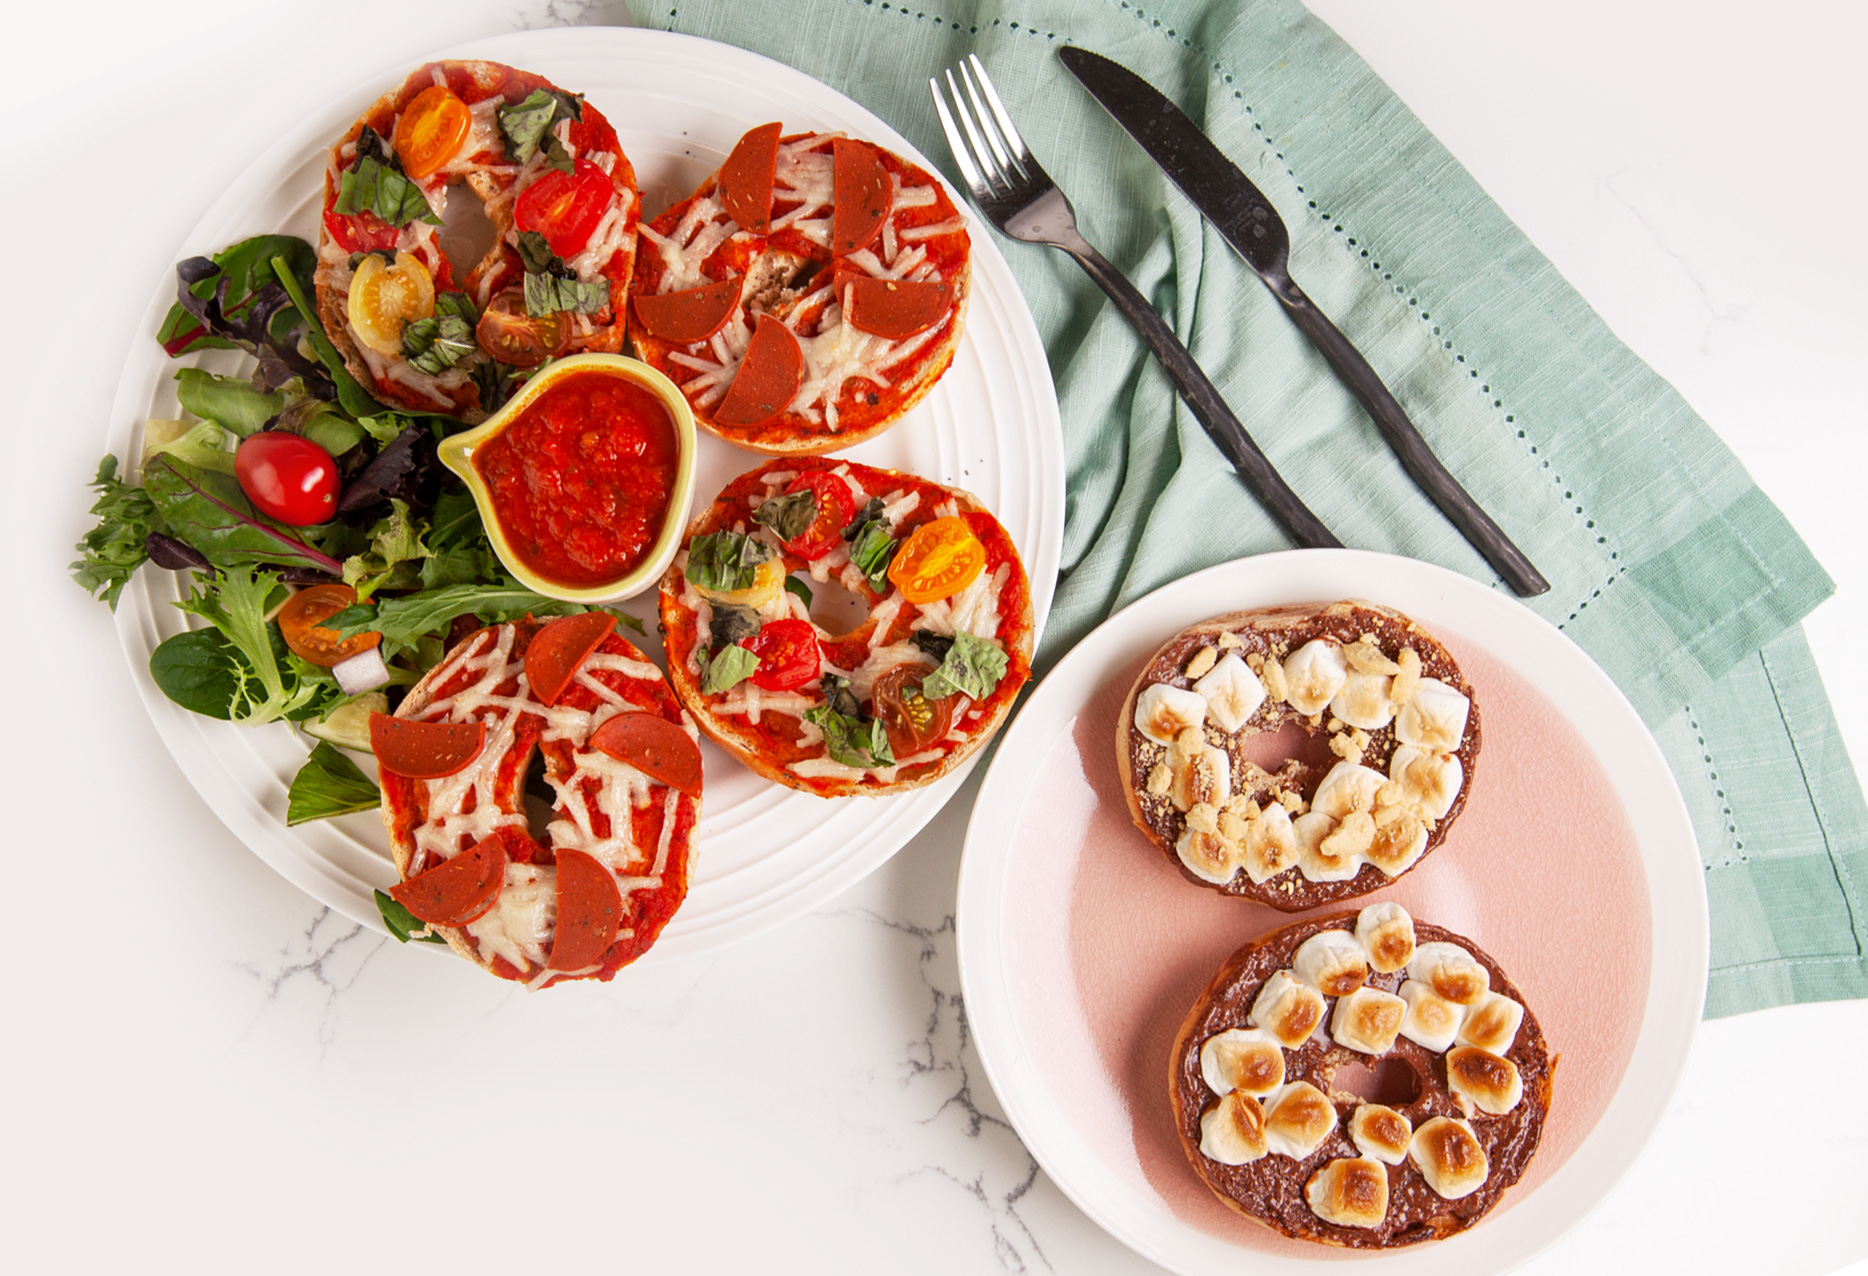
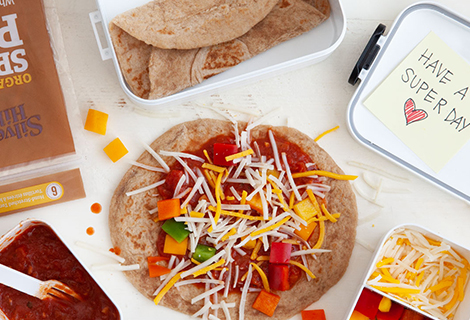
Packable Tortilla Pizzas
Our tortilla pizzas boast all the fun of pre-packaged, make-it-yourself pizza boxes but use much healthier ingredients. On top of our sprouted tortillas,* kids can spread marinara sauce, plant-based cheese, and all their favourite veggie toppings.
No bento box for the tortilla pizza? No problem! Simply pack these into 3 to 4 small containers instead.
(Scroll down to get the ingredients and instructions for our Packable Tortilla Pizzas)
*We’re sorry.
Our sprouted tortillas are taking a short break from store shelves.
Sign up for Silver Hills Bakery emails to get tortilla news first!
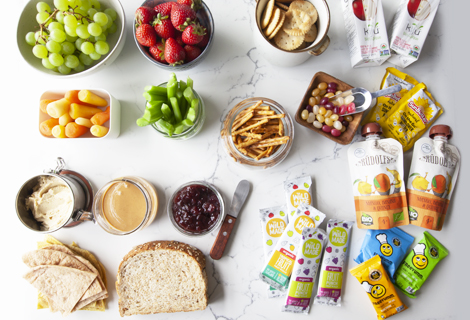
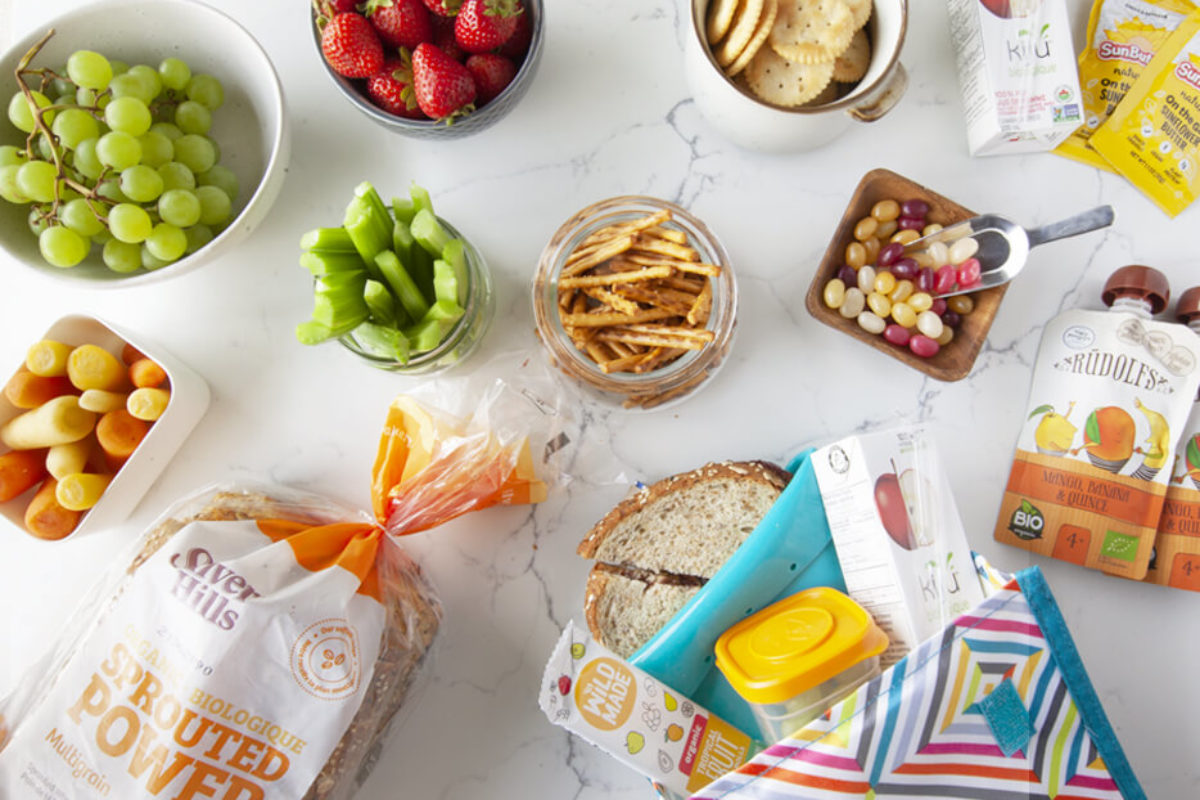
Healthy DIY Lunch Packing Station for Kids
Empowering kids to make their own meals supports independence, boosts confidence, and provides opportunities to learn life skills. As a family, you can help build healthy eating habits by making a selection of healthy food options accessible. Simple things, like including kids in food prep routines, and storing healthy snacks and packable, lunch-worthy foods at kid-level in the fridge or pantry are excellent places to start.
But building healthy habits for life isn’t the only benefit to setting up a self-serve station for easy lunch prep.
The best part? When kids choose and prepare their own foods, they’re more likely to eat more of their lunch1. That means fewer bounce-backs and less wasted food—so the more healthy options they choose and prepare themselves, the more everyone wins!
How to make an easy self-serve lunch prep
and packing station with your kids:
Kitchen Items You’ll Need:
Food for Prepping Your DIY Lunch Packing Station:
How-To Steps: Setting Up Your DIY Lunch Packing Station for Kids:
Kid-friendly DIY Lunch Prep and Packing Station Tips:
Age-Appropriate Kids Cooking Skills for DIY School Lunches
Healthy habits start young. By getting kids involved with cooking and food preparation3, they start developing a healthy relationship with food. Learning to cook and understanding food as a child is directly connected to healthy food choices as an adult.2
In the kitchen, there are age-appropriate tasks for everyone, so don’t hesitate to get the kids involved. There are plenty of online resources and articles that share detailed lists of age-appropriate cooking skills. Every child is different, but as a general guideline, here’s a list of several lunch-related kitchen tasks for kids of different ages:
Preschool
(Age 3 – 4):
Primary
(K – Grade 3):
Intermediate
(Grades 4 – 7):
What easy lunch ideas work for your family? We’d love to see your little chefs getting creative in the kitchen! Post a picture of your kids cooking or share your kid-friendly lunch packing tips and tricks with us on our Facebook page or tag @silverhillsbakery on Instagram.
Ingredients
For the Packable Tortilla Pizzas:
- 4 Silver Hills Sprouted Bakery Organic Tortillas (or your kids' favourite variety of Silver Hills Bakery sprouted tortillas)
- ½ cup marinara sauce
- ½ cup plant-based cheese shreds
- 1 – 2 cups kid-friendly toppings (we suggest diced bell peppers, pineapple, tomato, and/or shredded spinach)
For the Sprouted Stuffed Crust-free Sandwiches:
- 4 slices Silver Hills Sprouted Bakery Organic Soft Wheat bread
- 2 Tbsp nut-free butter (use your kids' safe-for-school favourite)
- 2 Tbsp jam
Featured Product Soft Wheat
Instructions
For the Packable Tortilla Pizzas:
- Thoroughly wash veggie toppings, slice or dice into bite-sized pieces, and combine*.
- In a bento box, pack whole grain tortillas, diced toppings, marinara sauce and plant-based cheese shreds into different compartments.
- Enjoy immediately or seal and store in the fridge or lunch bag until mealtime!
For the Sprouted Stuffed Crust-free Sandwiches:
- Slather nut-free butter and jam across two slices of bread and place together in a sandwich**.
- To make the sandwich an Uncrustable, use two cookie cutters of the same shape, one slightly smaller than the other. Cut the crusts off with the largest cutter or cup. Then, use the smaller cutter or cup to create a seal without cutting all the way through.
- Enjoy immediately or place in container and store in the fridge or lunch bag until mealtime!
Try these handy tips!
For the Packable Tortilla Pizzas:
-
- If your kid has a thing about foods not touching, pack toppings in smaller containers, or use silicone muffin liners to keep toppings separate until lunchtime
For the Uncrustables Stuffed Crust-free Sandwiches:
- ** Uncrustables seal a little more easily when the filling isn’t extra gooey under the seam. Don’t worry—you don’t have to go all the way to precision spreading to make these work. Just use a lighter hand near the edges. Or cut out the large shape first to make spreading within the lines a little easier for enthusiastic kids.
- Have a little seasonal fun with your choice of shapes. You don’t need a drawerful of fancy cookie cutters for every occasion. A simple circle can become anything from a fall pumpkin to a wintery snowman, or whatever else your little one can dream up!