Article Healthy Lunch Hack: How to Pack a Non-Soggy Sandwich

The Soggy Sandwich Solution:
How to keep sandwiches from getting soggy overnight in the fridge or in a lunch box

September 08, 2025
Article by

Silver Hills Bakery

Back to school or back to routine, packed lunch season can be fresh, healthy and fun when you learn how to pack a non-soggy sandwich!

Say goodbye to desk lunch disappointment and sad school lunches.

We’ve got you covered with:

  • Two sandwich packing how-tos to cover any lunch to-go scenario
  • A top 6 list stuffed with wrapped sandwich secrets and non-soggy sandwich making tips
  • Sandwich recipe examples to help you pick the best way to pack any kind of sandwich

Scroll on to become a sandwich packing master—or hop to the section you need now by clicking on the table of contents.

Why Does My Sandwich Get Soggy in the Fridge?

Soft and fluffy or seed stuffed and hearty—all bread is porous.

And just like a sponge, it will suck up any moisture in the sandwich fillings you pair it with.

So, the wetter the fillings—and the longer they’re in contact with your bread—the greater the risk of a soggy sandwich!
How to Pack Non-Soggy Sandwiches — Method #1: Send Ingredients Separately

The best way to prevent sandwiches from getting soggy in the fridge overnight or in a lunch box? Keep your fillings and spreads separate from your bread until it’s time to eat!

But that doesn’t mean making your sandwich from scratch at your desk. Or teaching your kid how to cook at the lunchroom table.

It’s all about the packing! And you can do it with as few as two reusable containers.

What you need:

  • 2 reusable containers with lids (or more as needed for sauces and spreads)
  • 2 slices sprouted bread
  • Sandwich fillings
  • Spreads / sauces / dressings

Step-by-step instructions:
Separate ingredient sandwich packing:

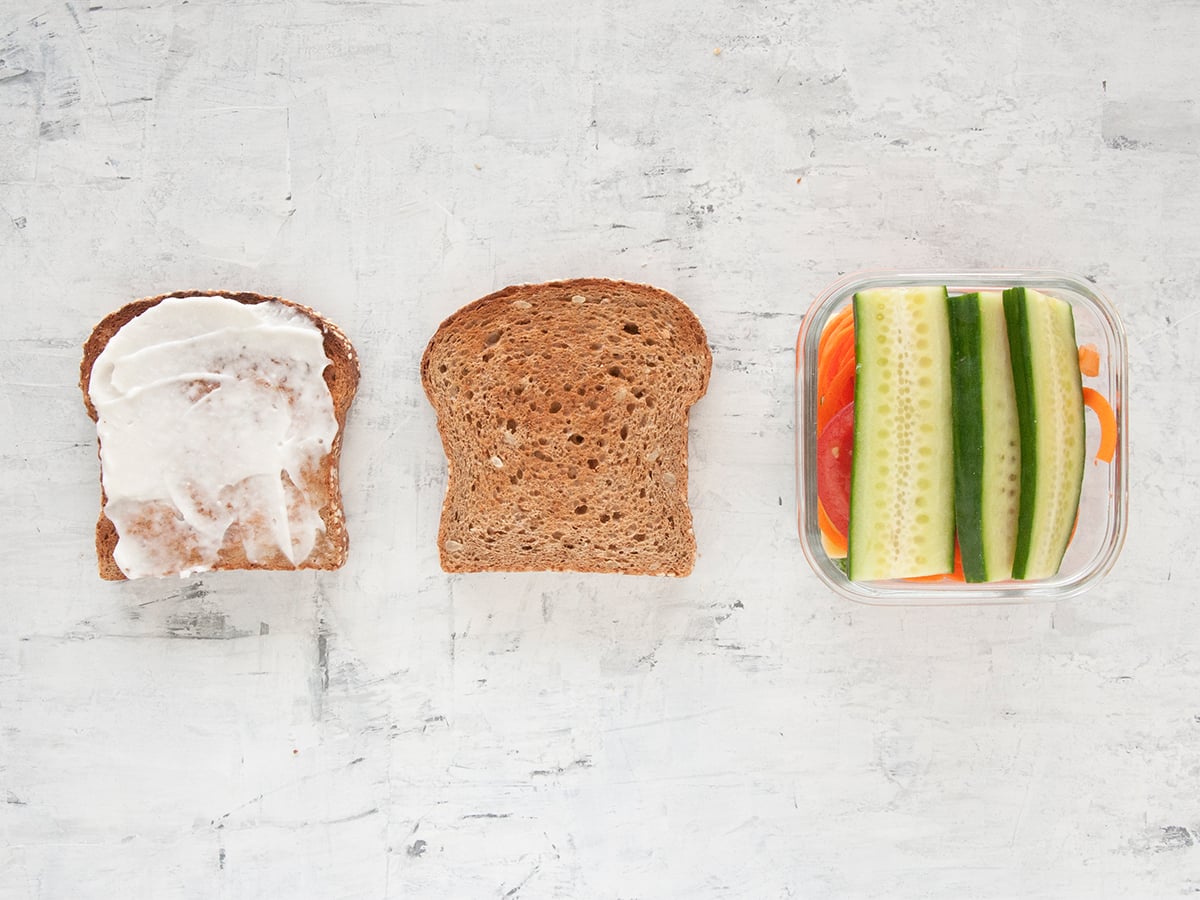
  1. Pack 2 slices your favourite Silver Hills Bakery sprouted bread in one lidded container.
  2. In another lidded container, stack your sandwich fillings in the order you want them inside your sandwich. (If you have any sauces or wetter spreads, pack them in separate small container/s).
  3. At lunch time, apply any sauces or spreads to your bread.
  4. Take the lid off your sandwich filling container and place one slice of bread on top of your fillings, spread side in.
  5. Put the lid back on your sandwich filling container (loosely). Hold the lid in place with one hand and flip the container over so the fillings are on top of the bread.*
  6. Put the lid on the table. Take off the sandwich filling container. Add the second slice of bread. And enjoy your non-soggy sandwich!

* Use a plate instead of the lid if you’re in an office or lunch room with tableware available.

Three Silver Hills Bakery Sandwich Recipes Perfect for Packing with the Separate-Ingredients Hack

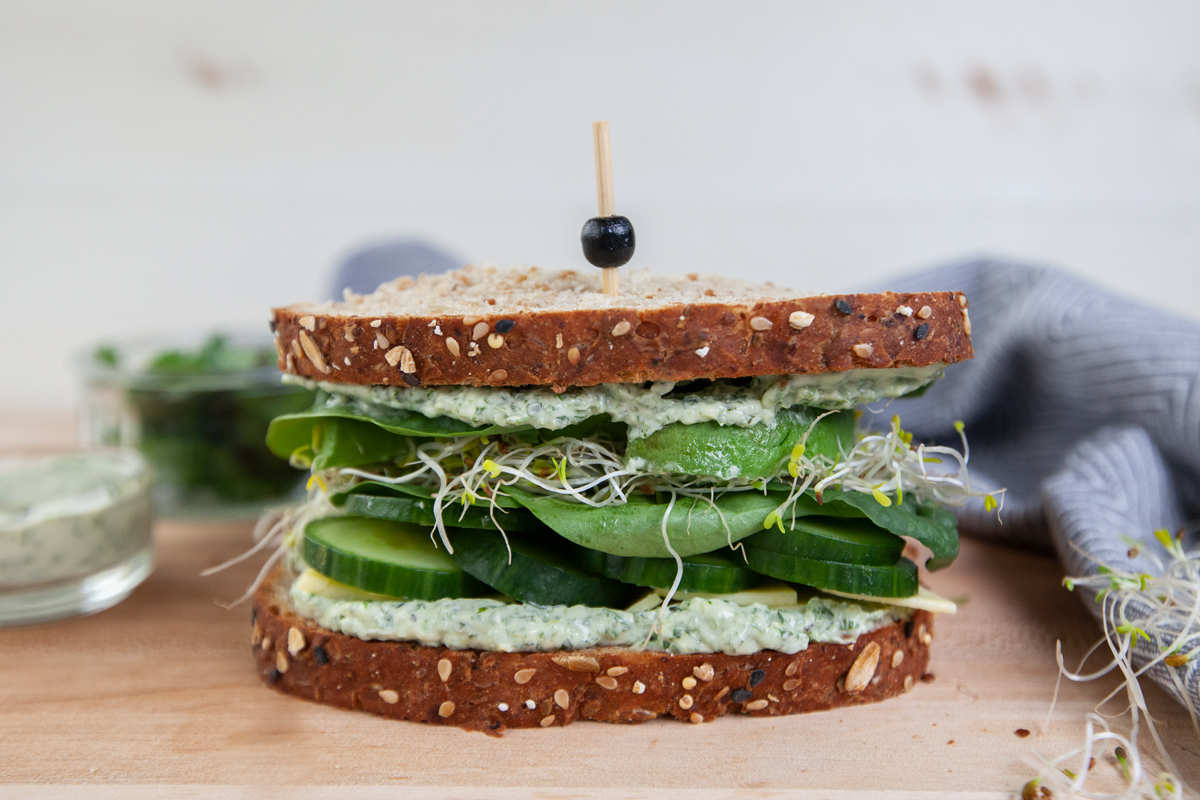
Fresh & Healthy Green Goodness Sandwich

Piles of cucumber and sliced avocado. A zesty, creamy dressing. This greens and sprouts stuffed sandwich is dripping with flavour—and that makes it a star candidate for the separate-ingredients treatment.

Send the Green Goodness dressing in its own container to keep everything else crisp and fresh! Goodness dressing in its own container to keep everything else crisp and fresh!
Ultimate Plant-Based Alpine Sandwich

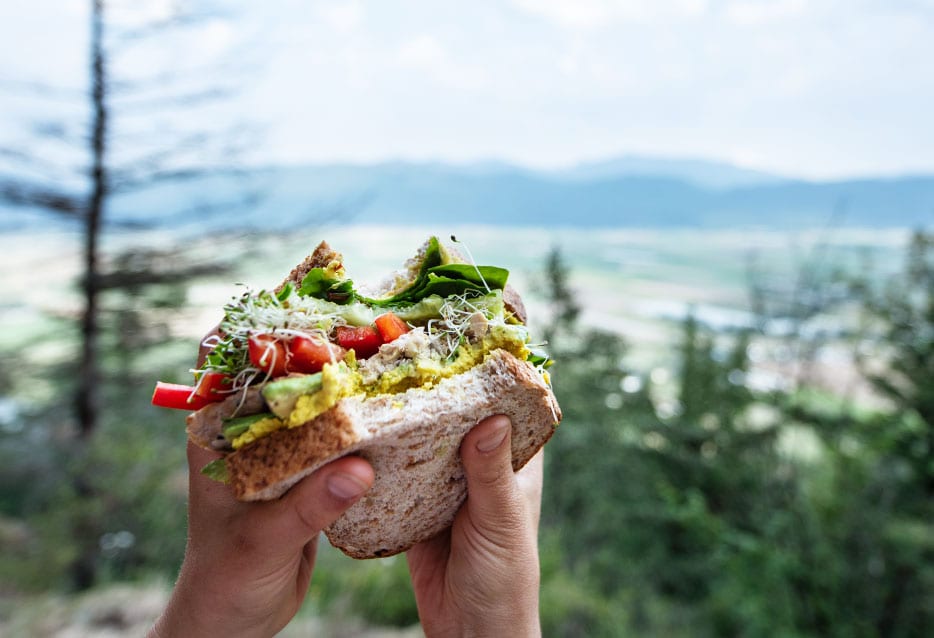
Slathered with hummus. Bursting with sliced fresh peppers, cucumber, and avocado. This colourful sandwich has heft that’s hard to hold together for travel.

So, stack the ingredients in separate containers. And don’t stress about this sandwich’s structural integrity any longer than it takes to eat it!

Savoury Peanut Butter Sandwich

Stuffed with whole chickpeas, sliced cucumbers, and greens, and slathered with two savoury spreads, this sandwich is the best kind of messy!

Pack roly-poly protein packed chickpeas and fresh fillings separately. Then get ready to enjoy this satisfying non-soggy sandwich idea at its best!
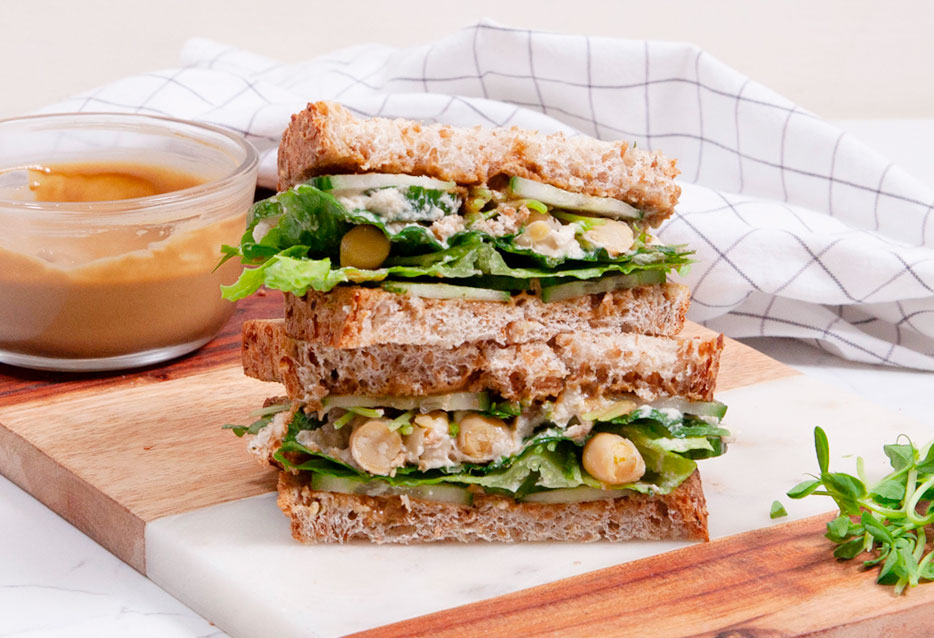
Savoury Peanut Butter Sandwich on Sprouted Bread

back to top

Top 6 Wrapped Sandwich Secrets: 
How to Make Sandwiches Ahead of Time Without Getting Soggy

Some lunch locations and on-the-go occasions call for a sandwich that’s ready to eat without assembly. Or one that doesn’t come with a collection of containers to cart there and back.

When a wrapped sandwich is on the menu, the fillings you choose are key. How you handle and layer them—and how you wrap your sandwich—matter, too.

Unlock the top six secrets to non-soggy wrapped sandwiches. And get ready for a lunch that tastes like it’s fresh off the cutting board hours after you’ve left the house.

Non-Soggy Sandwich Tips: Ingredient Order and More!

Start every wrapped sandwich with these first three tips, no matter what filling you choose:

1

Build on a base of lightly toasted or frozen bread.

Toasting gives bread crunch by drying it out. And the dryer the bread, the more moisture it can absorb from your fillings before it begins to get soggy. Lightly toast your bread and let it cool completely before starting sandwich construction. 
 
Still want a soft bread sandwich? Don’t worry! After a few hours wrapped with its fillings, the crispness of lightly toasted bread will fade. 
 
And if your toaster has a bagel button, use it to toast only one side of each slice. Then put your fillings on the toasted side with the soft side facing out.
 
On the flip side, freezing makes bread less porous, so frozen bread absorbs less liquid. Making sandwiches in the morning? Use frozen bread to buy an extra couple of hours of soggy sandwich prevention until it thaws.

1

Make a moisture barrier.

Protect each slice with an ingredient that can keep moisture out.
Add a thin layer of an oil-based spread like non-dairy butter or vegan mayo to both sides.
Pair a slice of your favourite plant-based cheese with each slice of bread.
Or let a large leaf of dry lettuce get between your bread and fillings likely to leak.

1

Layer from dry to wet.

Order your sandwich fillings so the driest are closest to the bread, and the wettest are in the middle.
(Even if it means doubling up on sliced cheese or adding another leaf of lettuce!)

Non-Soggy Sandwich Fillings for Wrapped Sandwiches

Use these next three sandwich filling strategies to keep your sandwich from getting soggy in your lunch box:


1

Avoid wet ingredients and pat damp fillings dry.

Wonderful as they are, fresh, juicy tomatoes and refreshing sliced cucumbers are the non-soggy sandwich’s foe. Save them for days when you can keep them separate until showtime, or for sandwiches at home.
 
Fillings like lettuce and fresh sprouts don’t count as wet ingredients by default, but you need to wash them for food safety. Use a salad spinner or pat them dry with a clean cloth or paper towel before including them in your sandwich.
 
Some ingredients straddle the fence between wet and dry. Give damp fillings like pickles and olives the same pat-down as freshly washed lettuce.

Because the dryer the ingredients going in, the less soggy the sandwich!

1

Make your sandwich with cold or room temperature fillings. 

Using leftovers? Roasted veggies especially for your sandwich or crisped up some tempeh bacon? Let your fillings cool before turning them into a sandwich. 
 
Why? Even low-moisture fillings like grilled tofu can make a sandwich soggy if they’re steaming hot. So, cool fillings are worth the wait on the quest for non-soggy packed sandwiches!

1

Trade fresh for dried or roasted.

Still crave tomatoes? Reach for marinated sundried tomatoes instead! (Pat them dry before you add them to your filling). 
 
Other fresh sandwich fillings have low-moisture alternatives, too.

Try roasted red peppers, or dry roasted eggplant—both bring loads of flavour to the party without making your sandwich soggy. 

back to top

How to Wrap a Sandwich So It Doesn’t Get Soggy — Method #2: Parchment Paper for the Win!

Ditch single-use plastic and learn how to wrap a sandwich in composable parchment paper. Because it’s not just better for the planet—it’s better for non-soggy sandwiches, too!

Plastic wrap and zip-top plastic hold wetness in. But uncoated parchment paper absorbs a little moisture—and that can stop your wrapped sandwich from getting soggy.

Worried your sandwich might get squished? Pop your parchment-wrapped sandwich in a sturdy reusable container—or a hard-sided lunch box. Then you can toss it in your bag or backpack safely!

Want your sandwich sliced? Wrap it once, slice across the fold, then wrap it again. The double-wrap holds everything together and offers two layers of extra absorption.

Watch the How to Wrap a Sandwich in Parchment Paper video to follow along with these 6 simple steps :

  1. Cut a rectangle of unbleached parchment paper about twice as wide and three times as long as your sandwich.
  2. Place your sandwich in the middle of the rectangle and fold the paper over so that the short edges meet.
  3. Make about ½-inch to 1-inch fold and repeat until the paper meets the edge of your sandwich, creasing along the way to ensure the fold stays tight.
  4. Centre your fold over the middle of the sandwich and tuck the top edge of the paper under each side of the sandwich.
  5. Fold both sides like the ends of a wrapped present. Continue folding the triangle a few times until you can tuck the paper tightly under the bottom of the sandwich.
  6. If you’re cutting your sandwich, make sure that you slice across the fold.

back to top

Bonus: Keep Your PB&J from Getting Soggy with 2 Simple Tricks

Classic PB&J is one of the best filling combos for parchment-wrapped sandwiches!

Whether you use peanut butter or a spread that’s safe for nut-free classrooms, you can have gooey PB&J goodness on the go! Skip the soggy sandwich sadness with these two tips:


1

Choose your nut (or nut-free) butter wisely.

The oilier and more liquid the spread, the soggier the sandwich!

Give natural single-ingredient nut butters that separate a good stir when you first open the jar. Mix all the oil that floats to the top through the whole jar, so every spoonful is as thick and spreadable as it can be. (And mix again before each use). 

School safe nut-free spreads like WOWBUTTER win the non-soggy sandwich gameespecially compared to seed butters (like sunflower) that are often on the runnier side than single-ingredient nut butters. 

In short: Choose the thickest, least-runny nut or nut-free butter available to you for the ultimate non-soggy wrapped PB&J!

1

Butter both slices.

Most PB&J makers put the nut or nut-free butter on one slice and the jam or jelly on the other. But when you pack this classic to-go, trade tradition for another technique—make a moisture barrier! Spread the nut or nut-free butter on both slices to keep jammy juices out! 
 
(The healthy fat in nut or nut-free butter adds a layer of soggy sandwich prevention between jelly and bread).

Low-Sugar Carrot Marmalade

Add some variety to your perfectly packable PB&J routine. Try our 5 Small Batch Jams to make with summer berries.

Or brighten up the darker days of fall with our easy Low-Sugar Carrot Marmalade! It only takes minutes to make. And it adds a sunny citrusy contrast to rich, creamy nut and nut-free butters any time of year!
Get more tips, tricks, how-tos, and easy, healthy recipes your family will love—scroll down to sign up for Silver Hills Bakery emails. And follow us on Facebook, Instagram, and Pinterest to add a slice of sprouted inspiration to your favourite social feed.

You might be interested in these similar articles ...